Build Tiny Home Shelters
With Micro Factories
Micro Factories
Building Hope for the Homeless
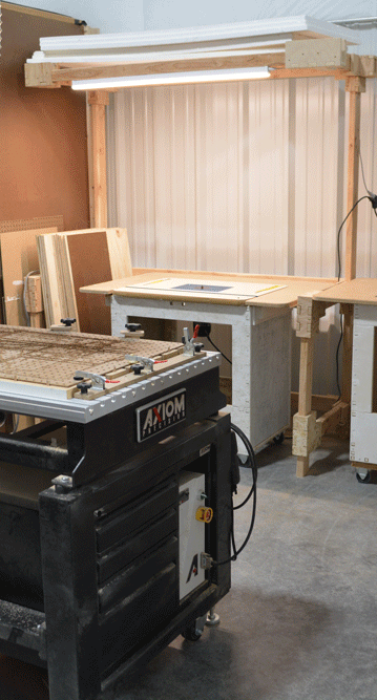
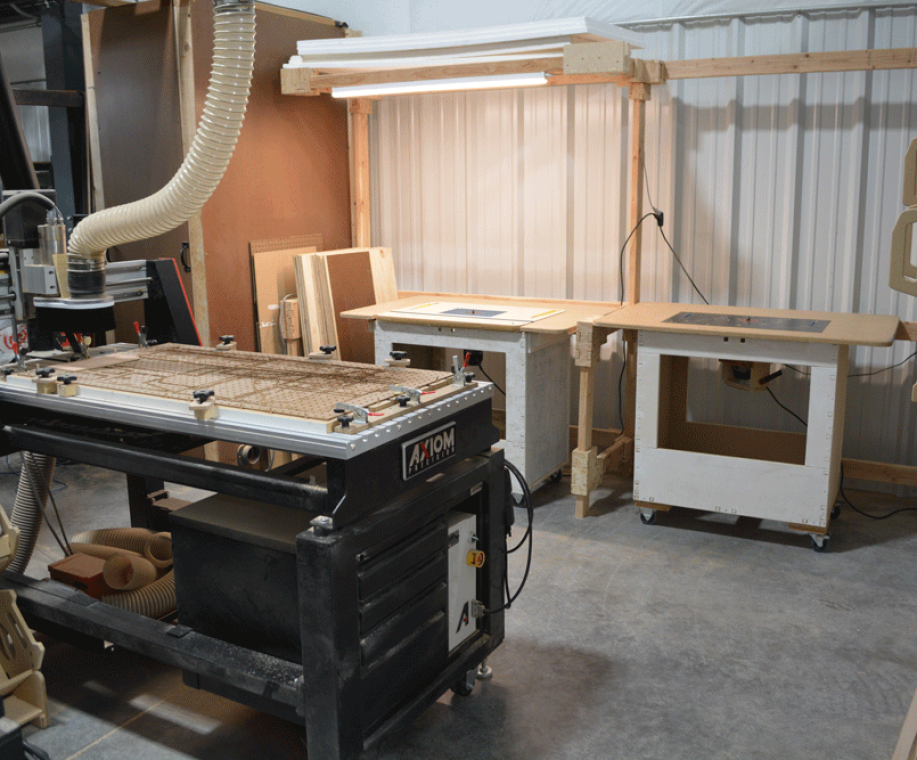
The Micro Factory is a prefabricated facility designed to empower cities and non-profits in constructing high-quality Tiny home shelters for the homeless. It is meticulously organized, with a place for everything and everything in its place, ensuring a clean, spacious, and well-lit area with easy access to tools. Shelves and French cleatwalls are installed for efficient tool management. All operations utilize marked jigs to ensure consistent construction, enabling even non-carpentry experienced workers to be effectively trained.
Precision Model Making with CNC Router
Perfecting Tiny Home Designs
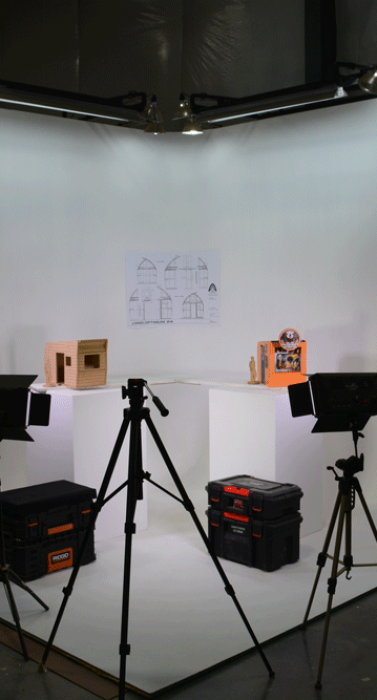
In the Micro Factory, we utilize a CNC router to create detailed 1/10th scale models of tiny home shelters, which are essential for visualizing and perfecting designs. These models include removable roofs and interior elements, along with scale human figures to depict occupant interactions.
Model Creation:
- Materials: High-quality materials are precisely cut for accurate models.
- Detailing: Models feature removable roofs and detailed interiors.
Scale and Accuracy:
- Occupant Representation: 3D printed or CNC-routed figures show scale and usability.
- Visualization: Realistic models provide a clear view of the final structure.
Design Refinement:
- Iterative Design: Allows for evaluation and adjustments before full-scale construction.
- Stakeholder Engagement: Facilitates better communication and input from stakeholders.
Decision Making:
- Assessment: Helps in deciding whether to proceed with construction.
- Optimization: Reviews and optimizes designs for better functionality and appeal.
Using CNC for scale models ensures meticulous planning and alignment among all stakeholders, enhancing the design process and building functional, effective housing solutions for the homeless.
Advanced Cyclorama Stage:
AI-Driven Quality Control and Training for Tiny Home Construction
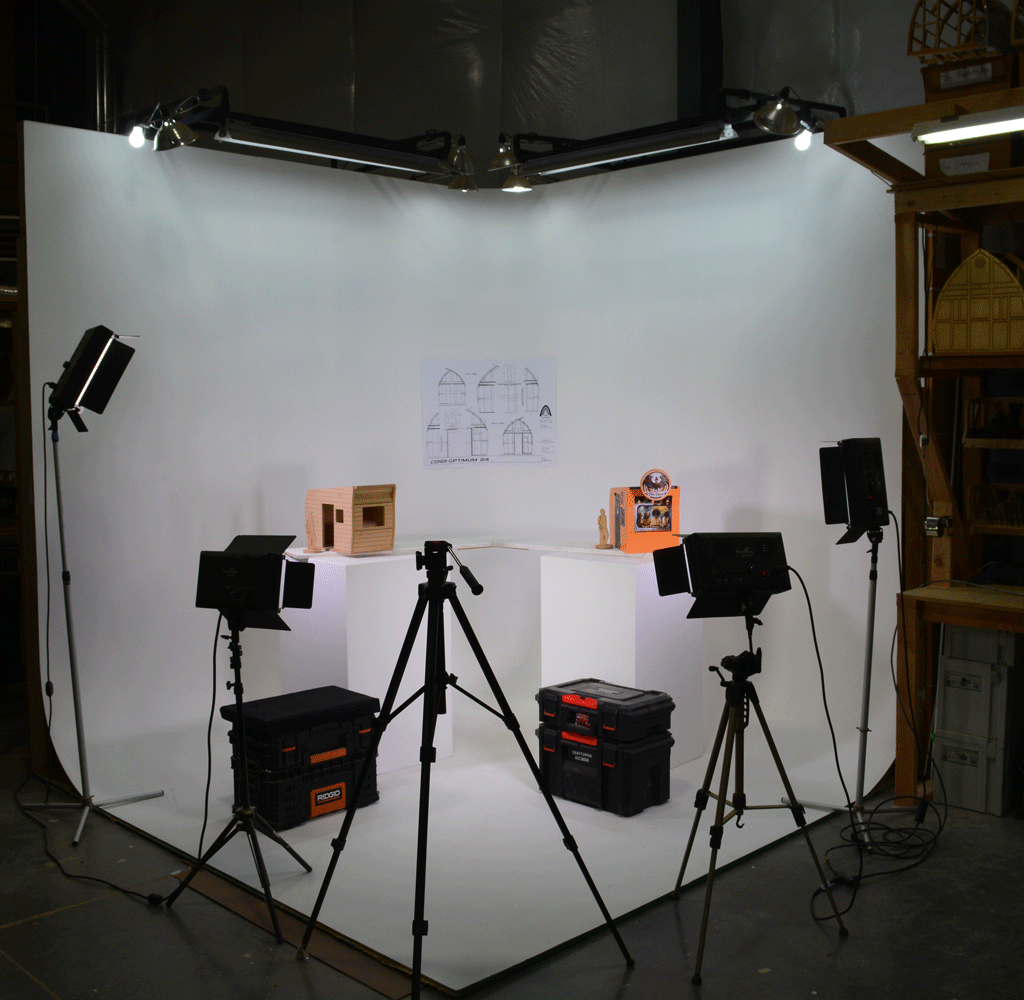
Photography in the Micro Factory is a pivotal element for ensuring the highest quality standards and efficient training for our tiny home construction process. This specialized setup begins on our Cyclorama stage with the scale models and then on the production floor utilizeing AI-driven analysis to evaluate every phase of building through detailed photographic documentation.
Cyclorama Stage Setup:
- Lighting & Background: Clear, detailed images are captured with multiple lights and a seamless white background.
- Cameras: High-resolution photos from various angles.
AI Evaluation of Scale Models:
- Input: AI analyzes photos and descriptions of 1/10th scale models, including scale human figures.
- Analysis: Evaluates functionality, space, and structural integrity, suggesting improvements.
Quality Control (QC) and Training:
- Process Documentation: AI is trained on photos of correct construction methods, including exact screw and hardware placement and then compares them with images taken on the production floor after each stage of production.
- Consistency: Ensures high-quality standards comparable to human QC.
- Training Tool: Provides consistent training data, improving worker adherence to best practices.
Advantages:
- Accuracy: Unwavering precision in QC and training.
- Efficiency: Streamlines QC and accelerates worker training.
The extensive use of photography and vdeography with AI-driven analysis ensures each tiny home shelter is built to the highest standards of quality and efficiency.
Shop Organizaion
Modular French Cleat Wall System:
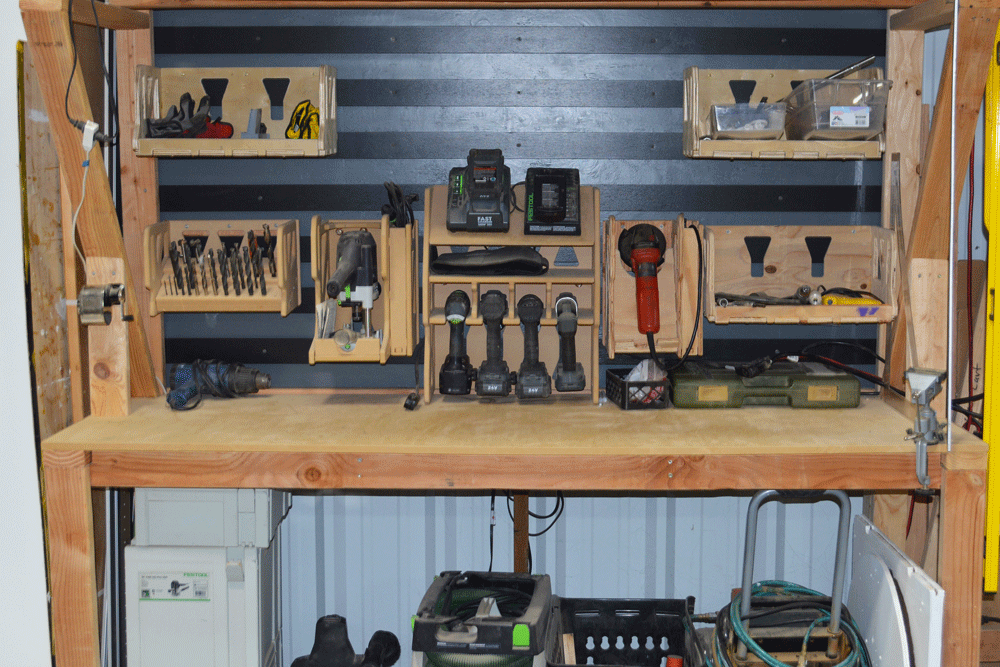
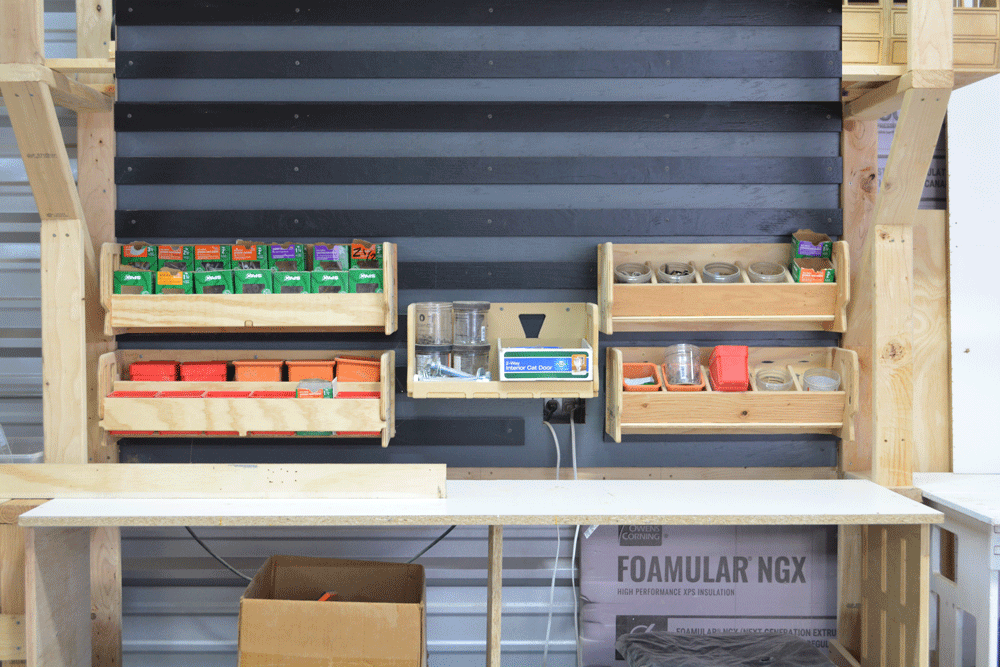
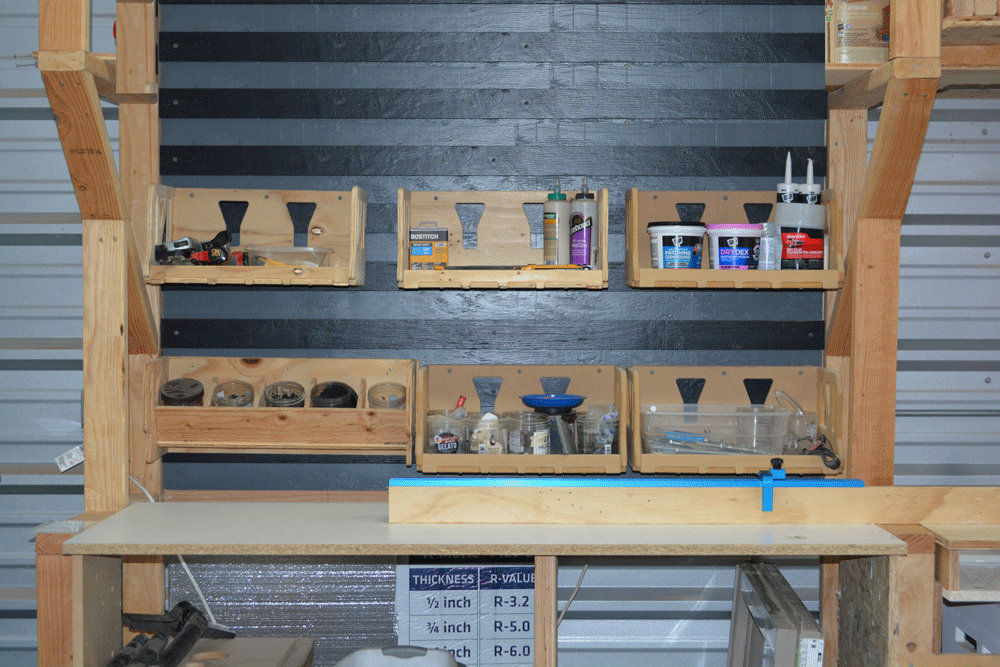
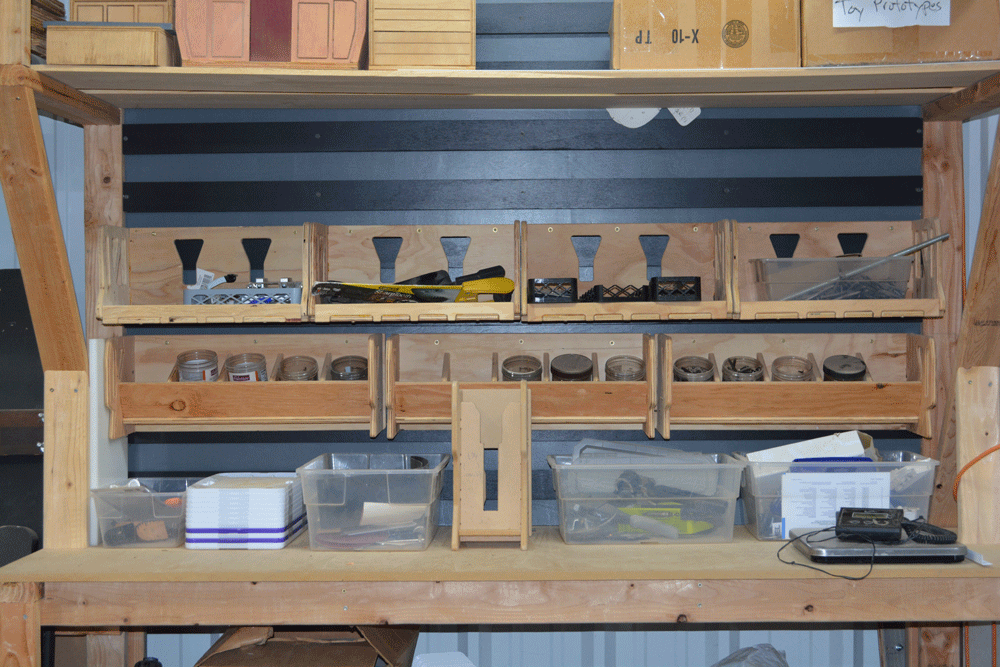
The side bench units surrounding the assembly station are equipped with a versatile French cleat wall system. This modular setup allows for highly organized and customizable storage, facilitating efficient construction and assembly processes.
French Cleat Wall System:
- Design: The French cleat wall system features horizontal cleats attached to the wall, enabling various storage boxes and tool holders to be securely mounted and easily repositioned.
- Customization: Modular in nature, the system allows for building custom storage solutions tailored to specific needs.
Custom Storage Boxes:
- CNC Router Fabrication: Custom boxes are designed and fabricated using our CNC router, ensuring precise dimensions and functionality.
- Organization: These custom boxes hold all necessary supplies, including screws, nails, tools, and other construction materials. Each box is labeled and placed according to the specific requirements of the assembly process.
Efficiency and Accessibility:
- Tool Accessibility: The system ensures that every tool and supply is within reach, minimizing downtime and enhancing workflow efficiency.
- Adaptability: Easily adjustable, the French cleat wall system can be reorganized as needs change, providing ongoing flexibility and optimization of the workspace.
The modular French cleat wall system significantly enhances the assembly station’s efficiency by providing a well-organized, accessible, and adaptable storage solution that supports streamlined construction and assembly processes.
Modular Mobility Workstations
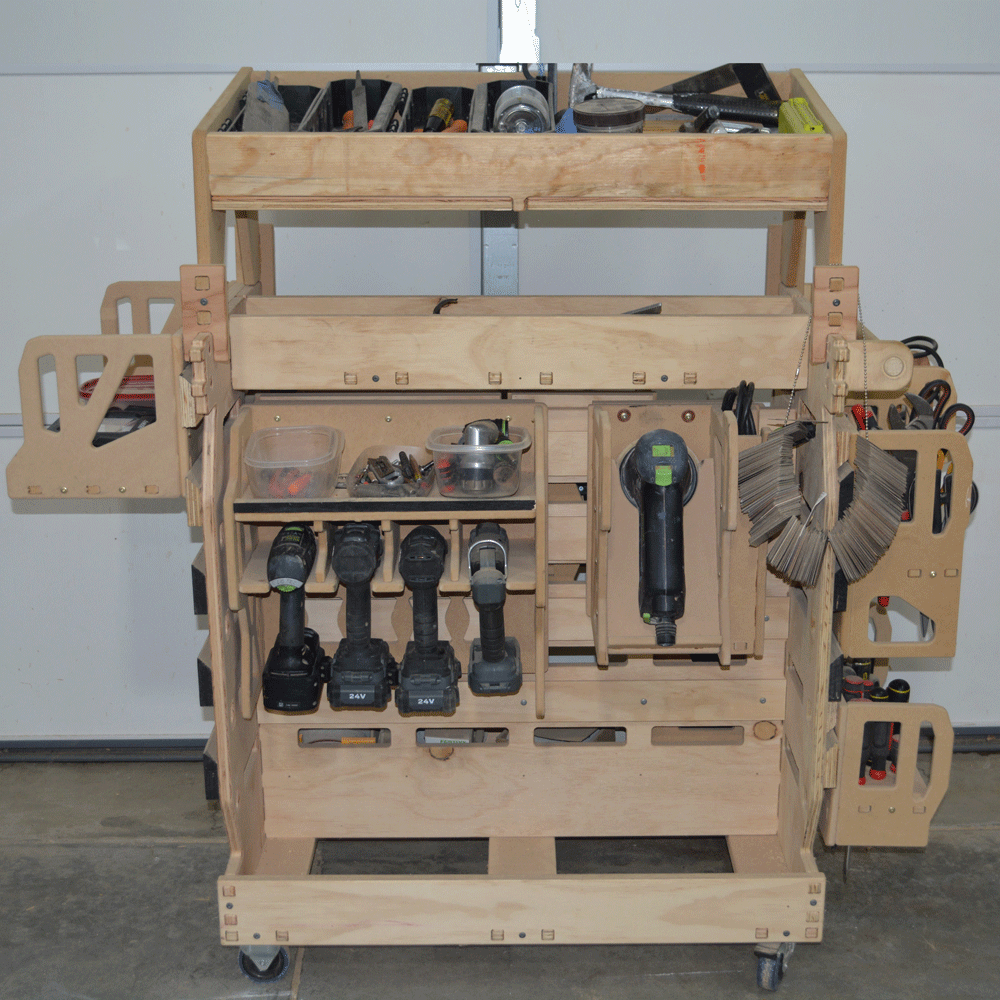
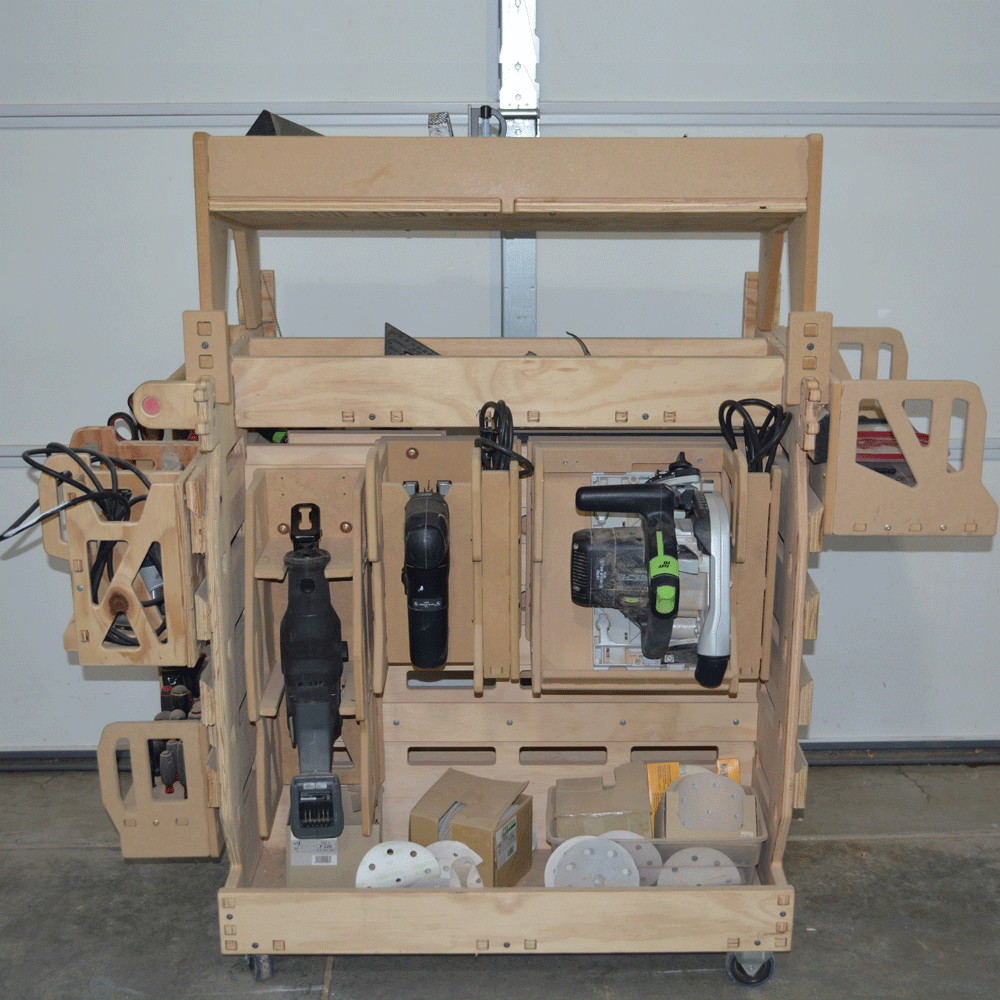
The Modular Mobility Workstations are an integral part of the Tiny Home factory, designed to enhance efficiency, organization, and flexibility in a compact workspace. These mobile tool carts and benches are equipped with locking castors, allowing them to be easily moved and positioned as needed to support various construction tasks.
System Design:
- Mobility: Each workstation is mounted on locking castors, enabling smooth movement to any location within the factory. This mobility ensures that tools and supplies are always within reach without the need to go back and forth to a stationary tool storage area.
- Locking Mechanism: The castors can be locked in place to provide stability and prevent unintended movement during use.
Organization and Storage:
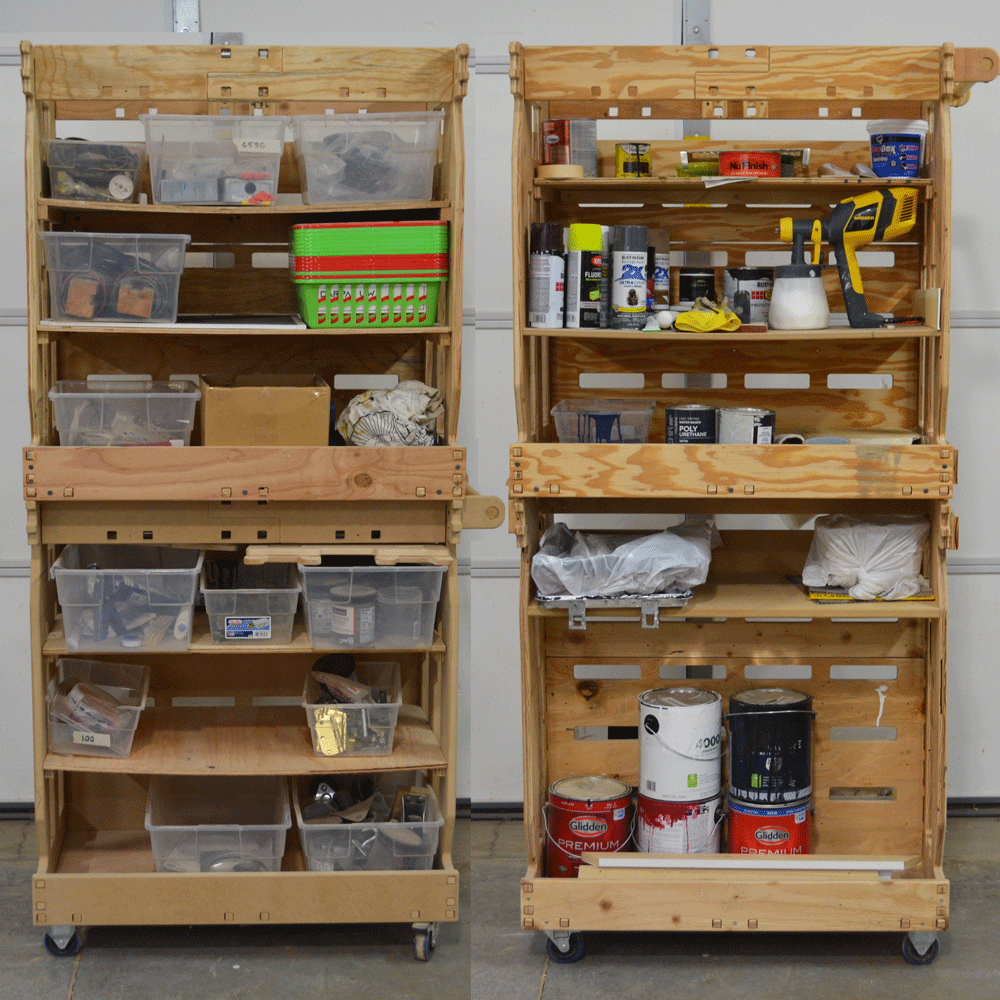
- Customizable Storage: The workstations feature customizable storage solutions, including shelves, bins, and tool holders, allowing for organized storage of tools, hardware, and materials. Each item has a designated place, reducing clutter and improving workflow efficiency.
- Accessibility: Tools and supplies are easily accessible, minimizing downtime and ensuring that workers can find what they need quickly.
Efficiency and Workflow:
- Task-Specific Configurations: Workstations can be configured to hold specific tools and materials required for particular tasks, ensuring that everything needed for a job is conveniently available at the point of use.
- Flexible Placement: The ability to move and position workstations as needed allows for flexible workspace arrangements, optimizing the use of limited space and supporting a more efficient workflow.
Space Maximization:
- Compact Design: The workstations are designed to maximize the use of limited space within the factory, aligning with the “sho-kukan” philosophy of making the most out of small areas.
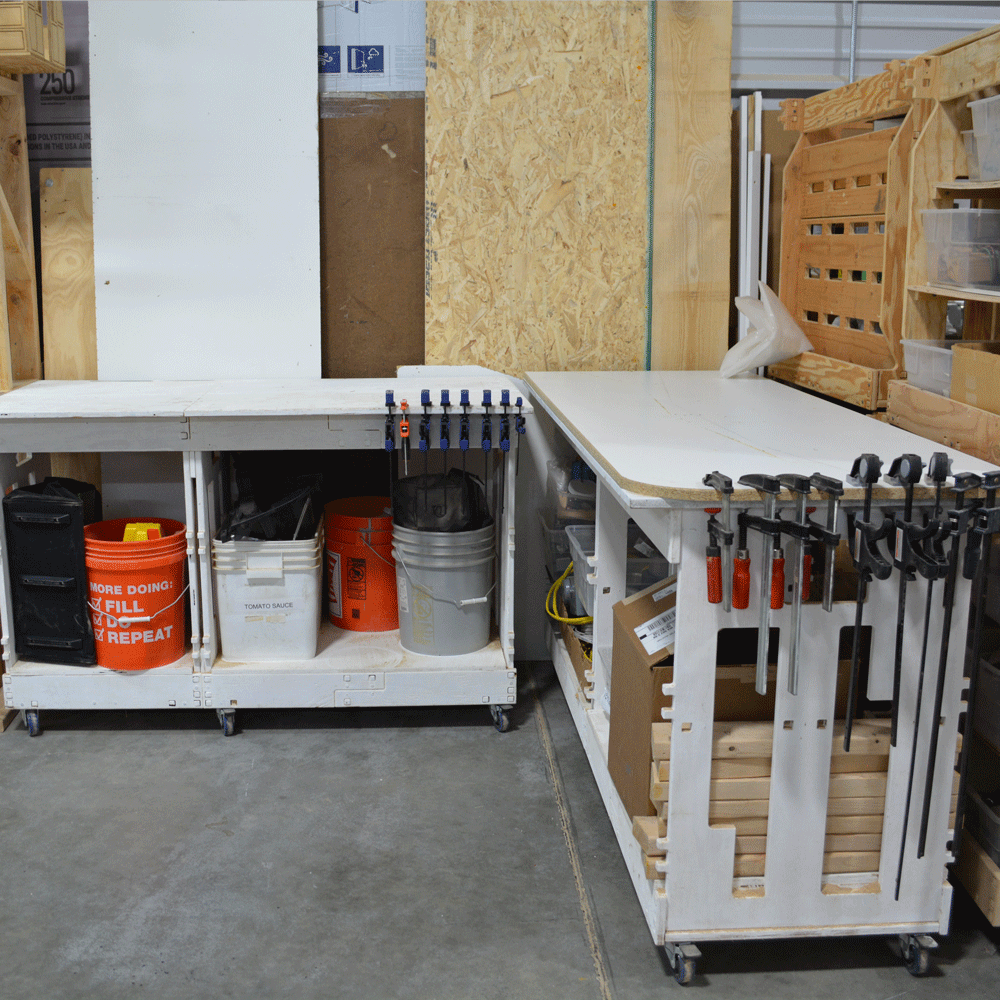
- Neat and Tidy Workspace: When not in use, the workstations can be rolled back to designated storage areas, keeping the workspace clear and organized.
Durability and Robustness:
- Quality Construction: Built from durable materials, the workstations are designed to withstand the rigors of daily use in a busy factory environment.
- Stable and Secure: The sturdy construction ensures that workstations remain stable and secure, even when loaded with tools and materials.
Usage Example:
- Assembly Area: The Modular Mobility Workstations are positioned around the assembly area, each customized with the tools and supplies needed for specific construction tasks. Workers can easily roll the workstations to their worksite, lock them in place for stability, and have everything they need within arm’s reach.
- Storage: After the tasks are completed, the workstations are rolled back to their designated storage areas, ensuring a clean and organized workspace ready for the next task.
By deploying the Modular Mobility Workstations in the Tiny Home factory, you significantly enhance the efficiency and organization of your construction process, enabling your team to work more effectively within a compact and dynamic environment.
Production
Precision Cutting with Miter Saw:
Ensuring Perfect Cuts
Once the structure is confirmed through our design process, we begin precision cutting using a miter saw, creating cut lists for each wall. Unlike onsite construction, which often relies on hand measuring and marking ("git er dun" approach) leading to imperfect cuts, our factory method guarantees exact sizing.
Miter Saw Cutting:
- The first round of cutting produces a single kit per wall for our initial production model. This model undergoes thorough scrutiny to ensure each stage is executed correctly and all pieces fit perfectly during assembly.
Drill Press for Electrical Channels:
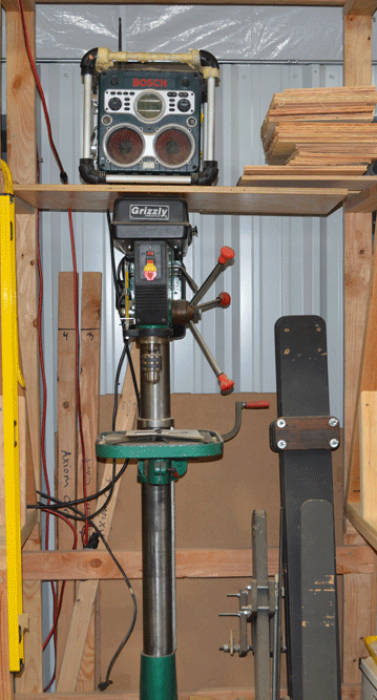
- Following the miter saw cuts, parts destined for electrical cables are predrilled using a drill press set up similarly to the miter saw. This step ensures ease of final assembly and maintains cleanliness by keeping dust and debris out of the assembly station. Like with the miter saw, the drilled sections are marked accordingly.
Kit Storage:
- After the drilling operation, the complete kit is sent to the wall frame kit storage rack, ready for the assembly process.
By incorporating these precise cutting and predrilling steps, we ensure perfect fits and maintain a clean, safe work environment, enhancing both the efficiency and quality of the final product.
Detailed Marking and Assembly Jigs
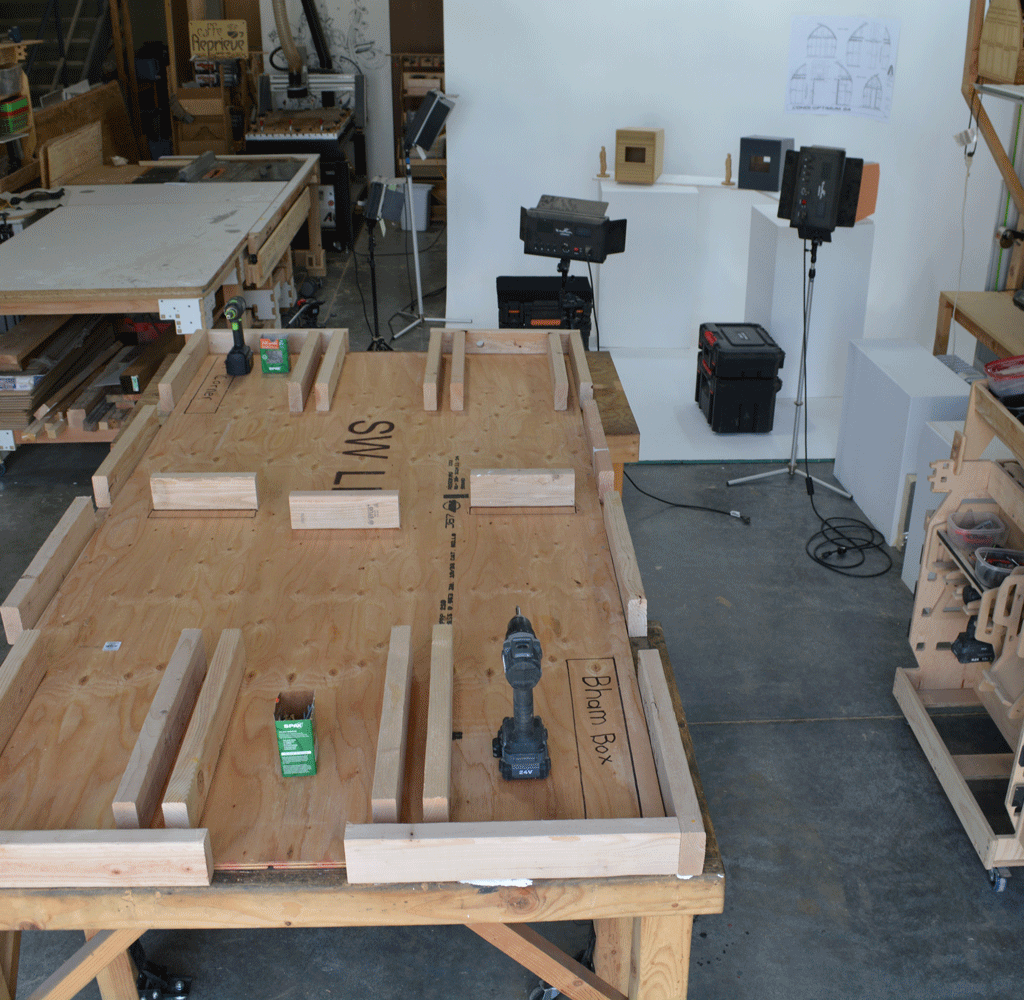
Each wall is constructed using assembly jigs like the one shown. The jigs are marked according to schematic instructions, ensuring that both the jig and the resulting wall carry corresponding markings for precise assembly.
Process Overview:
- Collection: The building team gathers precut kits, cut on a miter saw and stored on a wall frame kit storage rack.
- Marking and Placement: Each piece of lumber is marked and placed into the jig, which is also marked with corresponding sizes. This prevents errors, such as misplacing similar parts or incorrect assembly by trainees.
Assembly Jigs:
- Detailed Marking: All jigs and cut pieces are meticulously marked to aid in precision and assist in AI image analysis. This prevents mistakes, such as walls being assembled upside down.
Photographic Documentation:
- Wall Frame Photographic Rack: A specialized rack will be used to take photographs of all wall sizes. These photos are fed to the AI analyzer for correctness checks.
- Time Motion Studies: Photographs and time motion studies of the construction process will help in QC and costing, and identify areas for machinery upgrades, such as a self-feeding and measuring miter saw.
This comprehensive approach may seem excessive initially, but it provides vital data for AI and human QC, ultimately leading to a more cost-effective product. The data collected will help streamline steps and enhance the overall efficiency and precision of the construction process.
Comprehensive Assembly Stages:
From Wall and Roof Construction to Final Framing and Sheathing QC
Once the wall sections and floor are constructed, the assembly process begins, following detailed schematics and marked guidelines.
Assembly Process:
- Stage 1: Wall Assembly: Wall pieces are assembled onto the floor using portable alignment jigs and clamps.
- Stage 2: Roof Assembly: The roof is then assembled onto the completed wall structure.
- Stage 3: Outer Sheathing: Outer sheathing is attached to both the walls and roof.
- Stage 4: House Wrap: A water and air-proof house wrap is added for protection.
- Stage 5: Windows and Doors: Installation of windows and doors completes the framing and sheathing work.
Photographic Documentation and AI Quality Control:
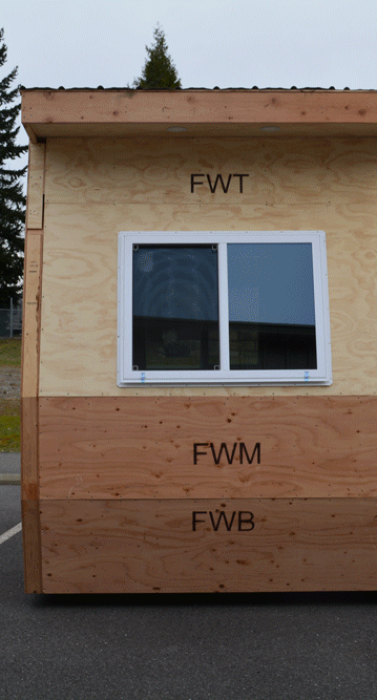
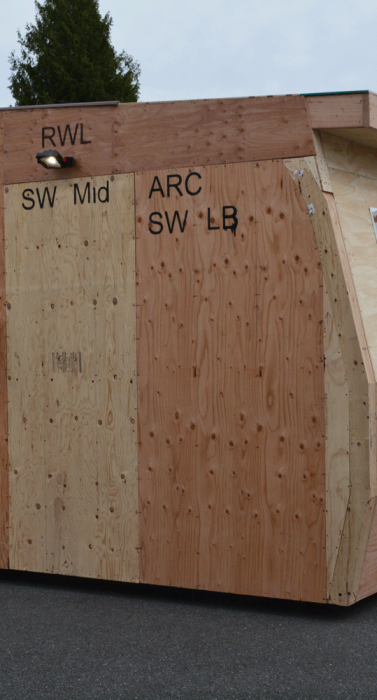
- Monitoring: After each assembly stage, photographs are taken from prescribed positions to monitor the construction progress.
- AI Analysis: These photos are sent to an AI system for preliminary review to aid human QC inspectors in their detailed inspections. This ensures precision and adherence to quality standards throughout each stage.
By breaking down the assembly into structured stages and utilizing AI-driven quality control, we ensure a meticulous and high-quality build for each tiny home shelter.
Final Exterior Assembly.
Precision Installation of Siding, Trim, and Metal Roof
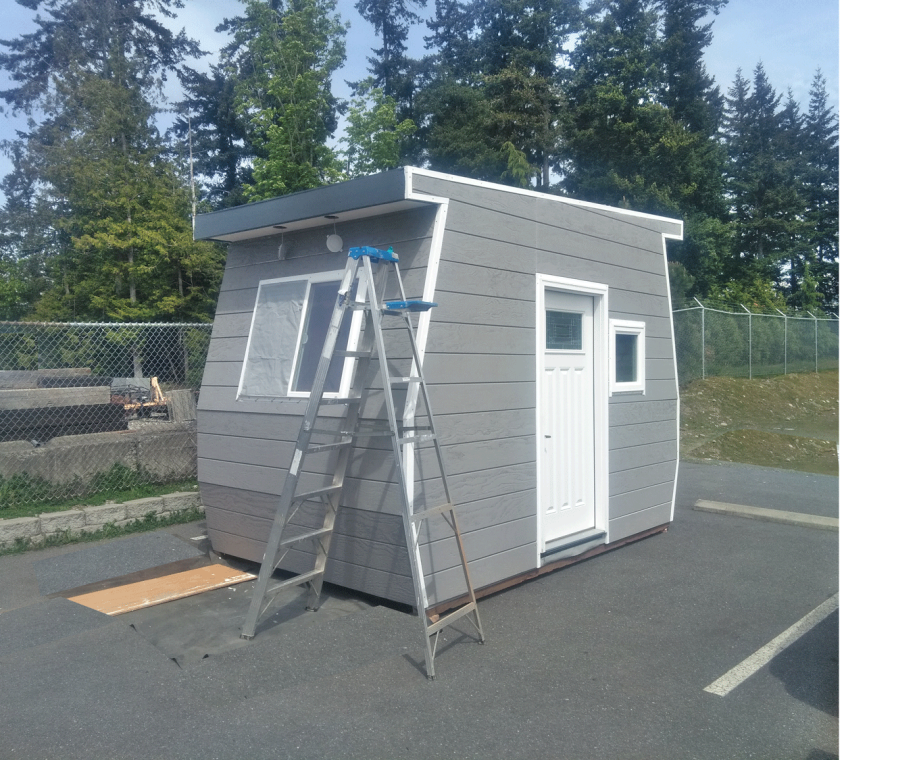
After completing the sheathing and wrap stages, the final exterior finishing of the tiny home begins with the installation of siding, trim, and the metal roof.
Siding and Trim Installation:
- Prepainting: Siding and trim are prepainted in a vented low-pressure paint booth using water-based, low-VOC paint. This process ensures a safe, environmentally friendly workspace and prevents paint particles from spreading throughout the factory.
- Application: The prepainted siding and trim are installed using screws and adhesive/waterproof caulking. This stage can be carried out both inside the factory or in a paved outdoor space.
Metal Roof Installation:
- Materials and Method: The metal roof is installed using dual sticky-side foam strip sealant and special sealed roofing screws.
- Precision: Pre-drilled holes, created using factory drilling jigs, ensure all drill holes are consistently placed according to the design specifications.
Quality Control and Documentation:
- Photographic Documentation: Perimeter photos are taken after all stages of the installation process.
- AI Review: These photos are reviewed by an AI system to generate reports for the human QC inspector. This continuous monitoring ensures precision and adherence to quality standards.
This comprehensive approach ensures that the final exterior finishing of each tiny home shelter is carried out with meticulous attention to detail, resulting in a durable, aesthetically pleasing, and high-quality product.
Electrical Installation
Engage a Licensed Electrician:
Phase 1: Requirement for Licensed Electrician
- Licensed Electrician:
- Hire a licensed electrician to perform electrical installation according to the plan.
Materials and Tools:
- Gather Materials:
- Collect all necessary electrical materials and tools as specified.
- Ensure materials meet safety standards.
Permits and Certification:
- State Permits:
- Obtain necessary permits for electrical work.
- Washington State Certification:
- Ensure the electrician holds a valid state certification.
Phase 2: Electrical Installation
- Installation Process:
- Following the Plan:
- Follow the detailed electrical plan for the structure.
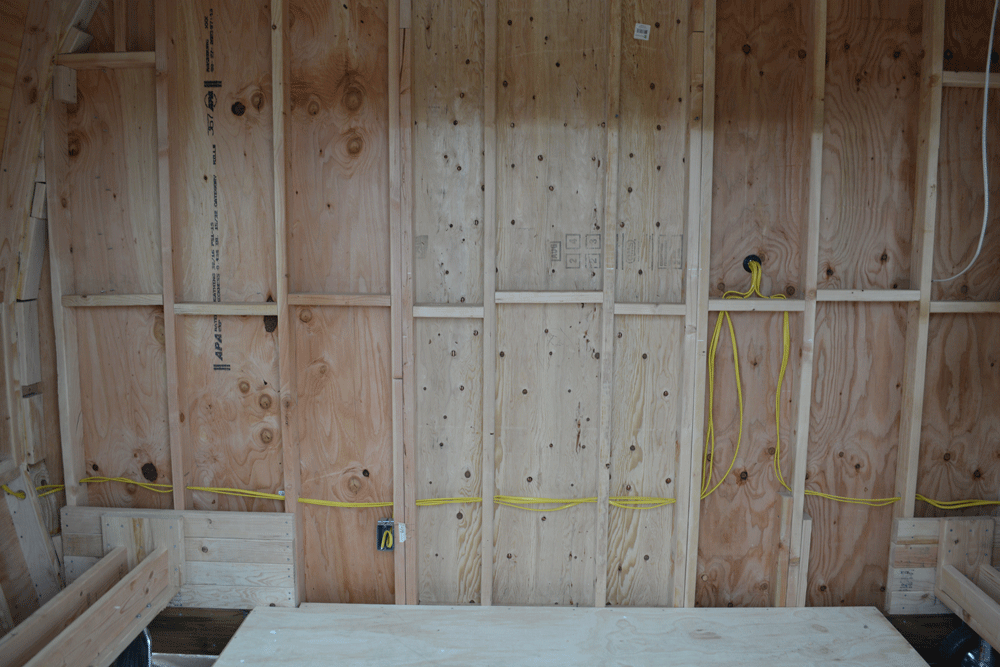
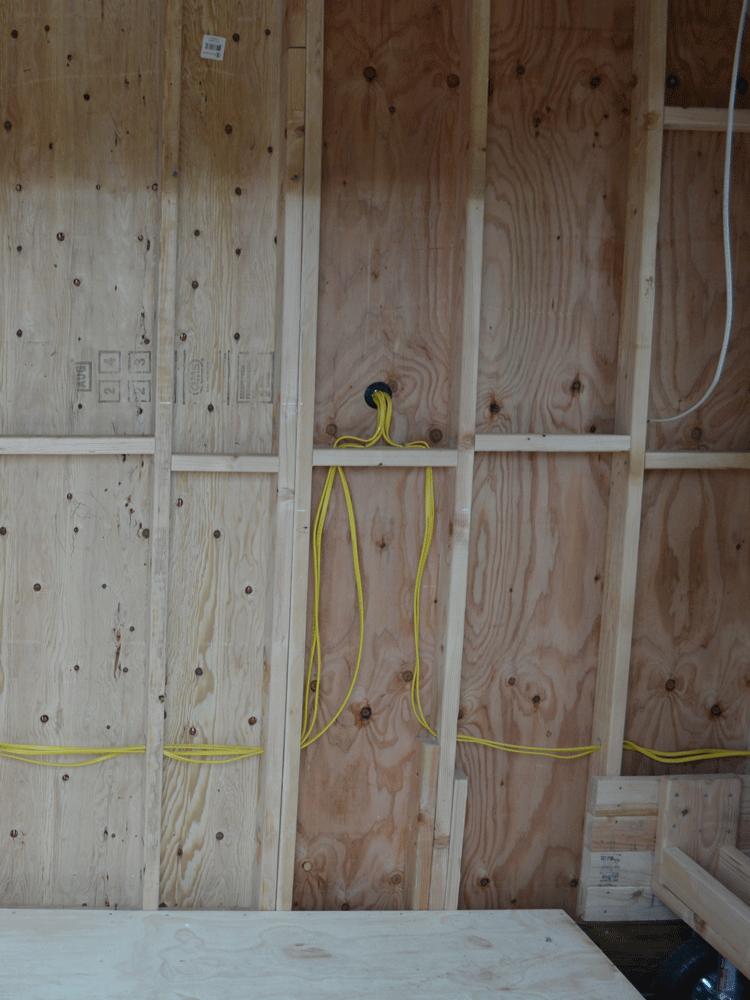
- Install wiring, outlets, switches, and fixtures as per design.
- Safety and Compliance:
- Comply with local building codes and safety regulations.
- Ensure safety and functionality.
- Following the Plan:
Phase 3: Final Inspections and Certification
- Inspection and Testing:
- Internal Inspections:
- Verify all electrical work meets safety standards.
- Test all electrical components.
- State Certification:
- State Inspection:
- Arrange for state inspector approval.
- Certification Medallion:
- Attach certification medallion upon approval.
- State Inspection:
- Internal Inspections:
Phase 4: Documentation and Quality Control
- Photographic Documentation:
- Capture Key Stages:
- Take photos at critical stages.
- Document components for compliance.
- AI Quality Control:
- Image Analysis:
- Use AI to check for correct installation.
- Human Inspection:
- QC team reviews using AI feedback.
- Address issues with corrective feedback.
- Image Analysis:
- Capture Key Stages:
By following these steps and involving a licensed electrician, you ensure a safe and compliant electrical installation, adherence to state regulations, proper certification, and high standards of workmanship through AI and human quality control.

Insulation Installation
We now execute a detailed insulation installation process divided into four key phases: Setup and Materials, Cutting Insulation Bats, Installing Insulation, and Quality Control and Documentation.
Phase 1: Setup and Materials We gathered necessary tools and safety equipment, measured insulation bats based on wall plans, and marked them for accurate cutting.
Phase 2: Cutting Insulation Bats Insulation bats were cut to specified sizes using utility knives and straight edges for precise fitting. Precut bats were labeled according to their designated areas.
Phase 3: Installing Insulation Precut insulation bats were installed snugly in wall cavities to maximize efficiency and secured using supports or adhesive as needed.
Phase 4: Quality Control and Documentation Photos of installed insulation were analyzed by an AI system for compliance with wall plans. A QC team member conducted a final inspection based on AI feedback, addressing any issues with supportive corrections.
By following these steps, you will ensure high-quality insulation installation that adheres to the project
specifications. The integration of AI-based quality control and human inspections ensures precise and
efficient workmanship, leading to a well-insulated and energy-efficient structure.
Sheetrock Installation
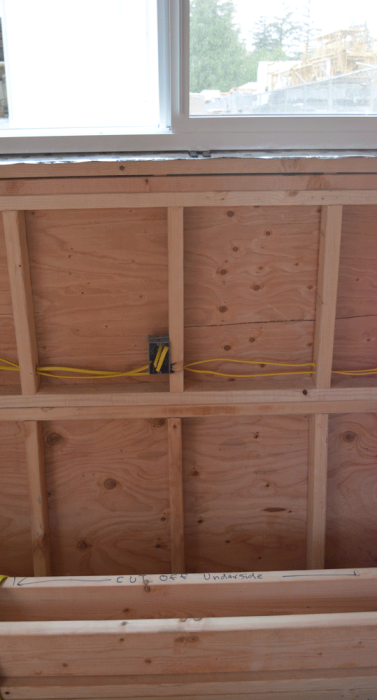
After the insulation is installed we will perform a detailed sheetrock installation process divided into four key phases: Preparation for Sheetrock Installation, Installing Sheetrock Panels, Finishing Sheetrock, and Quality Control and Documentation.
Phase 1: Preparation for Sheetrock Installation We gathered all necessary materials and tools, including sheetrock panels, cutting tables, utility knives, saws, screws, screw guns, sheetrock mud, tape, sanding equipment, safety gear, dust extractors, and vacuums. Marked and cut the sheetrock panels using templates for precise cutouts and screw placements.
Phase 2: Installing Sheetrock Panels The installation began with the ceiling panels, followed by wall panels, ensuring all cutouts for electric outlets and light boxes aligned correctly and securing them using pre-marked screw locations.
Phase 3: Finishing Sheetrock Applied sheetrock mud to fill screw holes and seams, followed by tape and an additional layer of mud. Once dried, sanded the joints and holes until smooth, employing safety measures like respirators and dust extractors. Thoroughly vacuumed the interior to remove residual dust.
Phase 4: Quality Control and Documentation Captured photos of key stages, ensuring clear views for quality control. Analyzed these photos with an AI system for correct installation and smooth finishes. A QC team member conducted a final visual inspection using AI feedback, addressing any issues with supportive corrections.
This structured approach ensured high-quality sheetrock installation, precise alignment, and a smooth finish, resulting in a well-finished and dust-free interior.


Interior and exterior light fixtures installation
For the final electric installation we install interior and exterior light fixtures with AI quality control and human inspection, divided into four phases: Preparation, Installation, Testing, and Quality Control.
Phase 1: Preparation We gathered necessary materials, including light fixtures, electrical covers, screws, wire connectors, and 3D printed outlet covers, organized into kits based on the electrical plan.
Phase 2: Installation Both interior and exterior light fixtures and covers were installed according to the plan, ensuring secure and insulated connections by certified workers or supervised trainees.
Phase 3: Testing The structure was plugged into a 110V RV plug. All light fixtures, switches, outlets, ACs, and heaters were tested for functionality and correct voltage, with photos and videos documenting the tests.
Phase 4: Quality Control Photos and videos were analyzed by an AI system to ensure proper installation and functionality. A QC team member reviewed AI feedback, confirming and signing off once criteria were met. Issues were addressed with supportive corrections.
Special Measures Custom 3D printed outlet covers were used to prevent overloading, with a guidance system implemented to help residents use the electrical system safely.
This approach ensured safe and proper installation of light fixtures and covers, with high standards maintained through AI and human inspections.
QC
FINAL INSPECTION and Punchlist
Lastly we use a comprehensive final inspection checklist covering nine key areas to ensure quality and craftsmanship:
1. Floor Exterior/Interior
- Secure plywood panels to floor joists.
- Ensure gaps with shims; check for loose screws and level surfaces.
2. Walls Interior
- Proper placement and secure attachment.
- Accurate cutouts for outlets; consistent seams and joints.
3. Doors/Windows
- Safe and secure installation.
- Proper alignment, insulation, caulking, and certified installers.
4. Trim
- Secure attachment and alignment.
- Smooth cuts, filled seams, and painted surfaces.
5. Siding
- Correct size, installation, and alignment.
- Secure fastening and even paint coverage.
6. Roof/Gutter
- Proper attachment and painting of roof components.
- Accurate installation of metal roofing and gutter systems.
7. Sheetrock
- Precise cutouts and secure attachment.
- Proper mud application, smooth sanding, and clean area.
8. Electric Outlets and Lights
- Proper installation and secure connections.
- Test functionality and correct voltage; video documentation.
9. Paint Finish
- Even coverage and smooth finish.
- Clean edges, no drips, and consistent touch-ups.
This checklist ensured thorough evaluation and high standards in tiny home construction.
CONTACT US
Get in touch
We can help you sow the seeds of hope.
4059 Hammer Dr. #104 Bellingham,WA 98226
Monday – Friday 09:00 – 5:00


